

Features
- High flexural strength and slight resilience.
- Due to its perfect thixotropy, Phoenix MD does not flow and can be injected directly in mouth, around the abutment tooth.
- A new layer can be applied on top of an existing one up to 2 to 3 days after, maximum.
- The new formulation has a setting time of 2’ 45″.
- Very thin oxygen inhibition layer.
Indications
- To make temporary crowns and long temporary bridges, with a pre-impression (indirect method). Due to its high consistency, it is suitable to inject some resin in the sulcus of the preparation, prior to put the resin-filled impression back in the mouth.
- To make temporary crowns directly in mouth (direct method). A temporary crown can be made in mouth within 3 minutes maximum.

| References & Presentations | |
|---|---|
| PHMD-50-A1 | 1 x 50ml cartridge, shade A1 +10 mixing tips |
| PHMD-50-A2 | 1 x 50ml cartridge, shade A2 +10 mixing tips |
| PHMD-50-A3 | 1 x 50ml cartridge, shade A3 +10 mixing tips |
| EJ-100 | 100 yellow mixing tips |
Indirect Method
- Inject PHOENIX MD in the pre-impression. Check that the nose of the mixing tip is always in contact with the bottom of the pre-impression, to avoid bubbles in the material.
- For incisives, use an intra-oral tip to be able to reach the bottom part of the impression.
- Also use an intra-oral tip to inject resin in the sulcus of the tooth, prior to putting back in the mouth the preimpression loaded with resin, to get a perfect temporary crown.
- Important notice: do not forget to withdraw the loaded impression from the mouth, after 1 minute maximum: the resin will be still in a plastic phase (soft) and it will not be blocked by the adjacent teeth. The material will recover after deformation.
- Wait for the resin to set completely in the impression, out of the mouth.
- Take the impression out of the mouth and eliminate the oxygen inhibition layer with a disinfection wipe or with a tissue impregnated with alcohol. This layer is always present in the 2 components resin products.
- Trim the excess with a diamond bur without water spray.


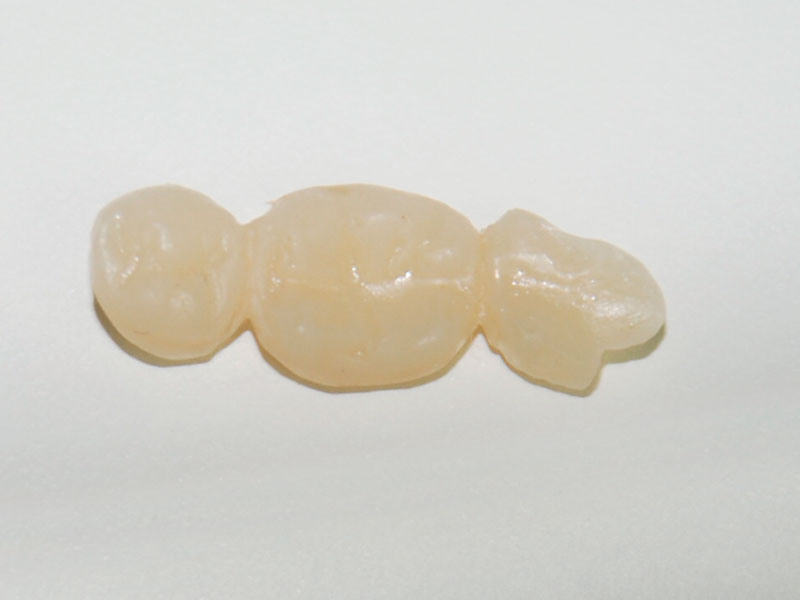
This type of resin is very hard and the use of a laboratory bur for resin is not recommended.
Direct Method
- Keep the prepared abutment tooth slightly humid. Put a yellow ring mixing tip and an intra-oral tip on the cartridge and inject PHOENIX MD directly onto the teeth, starting in the sulcus.
- Once, the tooth is completely covered, ask the patient to bite on the uncured resin.
- After about 40 seconds, the resin reaches an elastic phase. Ask the patient to open wide and take the untrimmed temporary crown off the tooth and put it back a few times, to avoid any blocking with adjacent teeth.
- Trim the excess in the mouth, using a diamond bur, under water spray.
- Trim the proximal walls outside of the mouth.
- Polish the crown. Seal it with a temporary luting cement.


| References & Presentations | |
|---|---|
| PHMD-50-A1 | 1 x 50ml cartridge, shade A1 +10 mixing tips |
| PHMD-50-A2 | 1 x 50ml cartridge, shade A2 +10 mixing tips |
| PHMD-50-A3 | 1 x 50ml cartridge, shade A3 +10 mixing tips |
| EJ-100 | 100 yellow mixing tips |
Indirect Method
- Inject PHOENIX MD in the pre-impression. Check that the nose of the mixing tip is always in contact with the bottom of the pre-impression, to avoid bubbles in the material.
- For incisives, use an intra-oral tip to be able to reach the bottom part of the impression.
- Also use an intra-oral tip to inject resin in the sulcus of the tooth, prior to putting back in the mouth the preimpression loaded with resin, to get a perfect temporary crown.
- Important notice: do not forget to withdraw the loaded impression from the mouth, after 1 minute maximum: the resin will be still in a plastic phase (soft) and it will not be blocked by the adjacent teeth. The material will recover after deformation.
- Wait for the resin to set completely in the impression, out of the mouth.
- Take the impression out of the mouth and eliminate the oxygen inhibition layer with a disinfection wipe or with a tissue impregnated with alcohol. This layer is always present in the 2 components resin products.
- Trim the excess with a diamond bur without water spray.
This type of resin is very hard and the use of a laboratory bur for resin is not recommended.
Direct Method
- Keep the prepared abutment tooth slightly humid. Put a yellow ring mixing tip and an intra-oral tip on the cartridge and inject PHOENIX MD directly onto the teeth, starting in the sulcus.
- Once, the tooth is completely covered, ask the patient to bite on the uncured resin.
- After about 40 seconds, the resin reaches an elastic phase. Ask the patient to open wide and take the untrimmed temporary crown off the tooth and put it back a few times, to avoid any blocking with adjacent teeth.
- Trim the excess in the mouth, using a diamond bur, under water spray.
- Trim the proximal walls outside of the mouth.
- Polish the crown. Seal it with a temporary luting cement.